
Get new windows from Sears Home Services!
Homeowner's Guide: Conducting Your Own Energy Assessment in 2024

Want to save some dough on your energy bills and do your bit for the planet? Start by performing an energy assessment of your home. You'll uncover the hidden energy leaks, make necessary improvements, and boost your home's efficiency while enhancing comfort.
This guide will walk you through the steps of conducting your own energy assessment in 2024. From finding air leaks, checking insulation, to inspecting your heating and cooling equipment, as well as assessing lighting and appliances, we've got you covered.
KEY TAKEAWAYS
- Taking proactive steps to enhance your home’s energy efficiency is beneficial to sustainability and the cost efficiency of your home.
- Learn how to perform an energy assessment on you home and discover ways to improve your home’s energy efficiency.
- Check windows, doors, siding, roof and HVAC system to find ways to save energy and reduce your utility bills.
We'll also give you a rundown on creating a comprehensive energy plan for your entire house. Throughout this guide, we'll provide handy tips and instructions, while mentioning the products and services available through Sears Home Services. Our aim is to give you the power to make informed decisions to improve your home's energy efficiency.
Step 1: Kick-Off Your Energy Assessment
Before diving in, understand why energy assessments are important. By conducting an assessment, you'll find out where energy is wasted in your home. With this info, you can make smart decisions to cut down your energy use. You'll save money on your bills and reduce your carbon footprint, making your house greener.
Conducting your own energy assessment puts you in the driver's seat. You control your home's energy usage, do it at your own pace, and make improvements that meet your needs. By finding ways to save energy, such as sealing air leaks, boosting insulation, or upgrading to energy-efficient appliances, you can drastically cut your energy use and lower your utility bills.
There are a number of tools and resources to help you get started with your energy assessment. Online energy assessment calculators can analyze your energy usage and give personalized energy-saving recommendations. Also, energy monitoring devices can track your energy use in real-time, helping you spot areas of high energy use and adjust accordingly. Plus, there are educational resources like energy-saving guides and tutorials that offer valuable insights and tips to help you effectively carry out the energy assessment.
Step 2: Spotting Air Leaks
When it comes to energy efficiency in your home, you can't ignore air leakage. Air leaks can cause energy waste, discomfort, and can even lead to higher utility bills. By finding common areas of air leakage and sealing them effectively, you can make significant strides in reducing energy consumption and improving indoor comfort.
Start your energy assessment by identifying common areas where air leaks happen in most homes. These include:
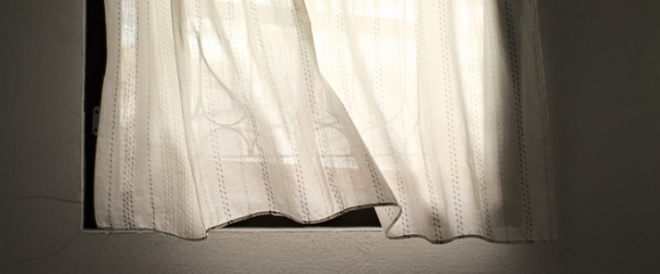
- Windows and doors: Check for any gaps or cracks around the frames. Apply weatherstripping or caulking if needed.
- Electrical outlets: Check outlets on exterior walls as they can be sources of air leakage. Put in foam gaskets or outlet covers to stop drafts.
- Vents and ducts: Look at vents and ductwork for any signs of leaks or gaps. Use foil tape or mastic sealant to seal any openings.
- Attic and basement: Insulate and seal any gaps or cracks in these areas. These areas can be major sources of air leakage.
Once you've found the problem areas, it's time to seal those air leaks. Here are some tips:
- Pick the right materials: Use caulking, weatherstripping, and insulation materials that are suitable for the specific areas you're sealing.
- Prepare the surfaces: Clean and dry the surfaces before applying any sealants for better adhesion.
- Use proper techniques: Apply caulking or weatherstripping in a continuous and even manner, and ensure a snug fit for insulation materials.
- Regular maintenance: Check for any new air leaks and reseal as needed. Regular maintenance is key for maintaining airtightness.
Improving your home's airtightness has several benefits. Firstly, it reduces energy waste by stopping conditioned air from escaping and outdoor air from entering. This means lower energy bills and less environmental impact. Secondly, it enhances indoor comfort by reducing drafts and temperature fluctuations. Lastly, it improves indoor air quality by stopping pollutants and allergens from the outdoors from getting in.
By assessing and dealing with air leaks in your home, you can take a proactive step towards energy efficiency and a more comfortable living space. Need expert help in conducting a thorough energy assessment or sealing air leaks? Get in touch with Sears Home Services today.
Step 3: Checking Insulation Levels
Insulation is key to boosting energy efficiency in your home. Acting as a protective barrier, it keeps heat from escaping in winter and keeps it out in summer. By checking insulation levels, you can find areas that need improvement and take steps to enhance your home's energy efficiency.
Start by checking the attic, as this area often has the most potential for heat loss or gain. Look for any visible gaps or signs of wear in the insulation. Also, measure the thickness of the insulation to ensure it's at recommended levels.
Next, look at the insulation in exterior walls and floors. These areas may be harder to access, but it's important to check their insulation levels. Look for any drafts or noticeable temperature differences near windows, doors, or outlets, as these could indicate insufficient insulation.
When it comes to choosing the right insulation materials, you have several options. Fiberglass insulation is a popular choice because it's affordable and effective. It comes in batts or rolls, making it easy to install in most areas of your home. Another option is spray foam insulation, which provides an airtight seal and is ideal for hard-to-reach spaces.
Remember, boosting insulation levels can lead to significant energy savings and a more comfortable living environment. If you're unsure about conducting your own energy assessment, consider consulting with professionals who specialize in home energy audits. They can provide expert advice tailored to your specific needs and help you make informed decisions about improving insulation levels in your home.
Step 4: Inspecting Heating and Cooling Equipment
Regular maintenance of your HVAC (heating, ventilation, and air conditioning) systems is crucial for their optimal performance and energy efficiency. By taking care of your equipment, you can ensure that it continues to run smoothly, saving you money on energy bills and avoiding costly repairs.
To optimize the efficiency of your heating and cooling system, consider the following tips:
- Change air filters regularly: Dirty filters restrict airflow, forcing your HVAC system to work harder and consume more energy. Replace filters every one to three months to maintain proper airflow and improve efficiency.
- Keep vents clear: Make sure that furniture, curtains, or other obstructions do not block the vents. Blocked vents prevent the even distribution of air, leading to inefficiencies.
- Adjust thermostat settings: Lower your thermostat by a few degrees in winter and raise it in summer to reduce energy consumption without sacrificing comfort.
In addition to these tips, it is important to be able to identify signs of HVAC equipment inefficiency. Some common indicators include:
- Inconsistent temperatures throughout your home.
- Unusual noises coming from the HVAC system.
- An increase in energy bills without a corresponding change in usage.
- Frequent breakdowns or repairs.
If you notice any of these signs, it may be time to replace your heating and cooling system. Schedule a free consultation with a Sears Home Services HVAC Expert to begin the replacement project.
Step 5: Evaluating Lighting and Appliances
When it comes to saving energy and reducing your carbon footprint, assessing the lighting and appliances in your home is a great place to start. Making small changes in these areas can have a big impact on your overall energy consumption. Here are some tips to help you evaluate your lighting and appliance usage:
- Use energy-efficient lighting: Switching to energy-efficient lighting options, like LED bulbs, can significantly reduce your energy consumption. LED bulbs are not only more energy-efficient, but they also last longer than traditional incandescent bulbs. By switching to LED bulbs, you can save money on your energy bills and contribute to a greener environment.
- Evaluate energy consumption of appliances: Check out the energy labels on your appliances. These labels provide valuable information about the energy efficiency of the appliance. Look for appliances with an ENERGY STAR certification, as they meet strict energy efficiency guidelines. You can also use a watt meter to measure the energy consumption of your appliances. This can help you spot energy-hungry devices and make informed decisions about their usage.
- Save energy usage in lighting and appliance usage: There are several simple steps you can take to reduce energy usage in lighting and appliances. Make it a habit to turn off lights when you leave a room or install motion sensor lights that automatically turn off when no one is present. Unplug electronics and appliances when they are not in use to avoid vampire energy consumption. You can also utilize power strips to easily turn off multiple devices at once. Lastly, consider utilizing natural lighting during the day and using task lighting instead of overhead lights to reduce energy consumption.
Step 6: Crafting Your Whole-House Energy Plan
Reducing your energy consumption and saving money on utility bills starts with a comprehensive whole-house energy plan. With a customized energy-saving strategy, goal setting, and tracking your energy usage, you can take control of your home's energy efficiency. Here are some tips to help you create your own whole-house energy plan:
- Develop a customized energy-saving strategy: Every home is unique, so assess your specific energy needs and determine the areas where you can make the biggest impact. Consider factors such as insulation, appliances, lighting, and heating and cooling systems. By identifying areas for improvement, you can prioritize upgrades and changes that will have the greatest energy-saving potential.
- Set goals and track energy usage: It's crucial to set realistic goals for energy reduction and track your progress. Start by establishing achievable targets, such as reducing energy consumption by a certain percentage over a specific period of time. Use energy monitoring tools and smart meters to keep track of your usage, and make adjustments as needed to stay on track.
- Follow these tips for maintaining long-term energy efficiency: Once you've implemented energy-saving measures, it's important to maintain them for long-term efficiency. Regularly inspect and maintain your insulation, appliances, and HVAC systems. Replace old, inefficient appliances with Energy Star-rated models. Use energy-efficient lighting, such as LED bulbs. And don't forget to seal air leaks and insulate your home properly to prevent energy loss.
By creating a whole-house energy plan and following these tips, you can significantly reduce your energy consumption and save money on your utility bills. Take the first step toward a more energy-efficient home today!
Get new windows from Sears Home Services!
Let the sunshine into your home with new replacement windows. Schedule a free consultation with our window experts.
Was this content helpful?
Improve Windows Resources

Seal the deal: Learn why window and door sealing is vital for energy conservation.

Discover the best window type for your house in 2024. Get expert advice from Sears Home Services.

Get answers to 10 common questions about window replacement in 2024. Find out what you need to know before replacing your windows.

Get expert advice on window replacement. Ask these 5 questions before choosing a service provider for your home's windows.